
Heads up! If you’re relying on Google Forms to check your email addresses, you might want to rethink your strategy.
Sure, it checks if emails look good, but does it ensure that those emails actually exist? Nope.
And here’s the kicker: It doesn’t even catch if they’re spam traps or duplicates on your list.
Feeling like you’re sending emails into the abyss? Probably because you might be, all thanks to Google Forms. Stick around and see what Google Forms misses and how to cover those gaps effectively with Bouncer.
How does Google Form Email validation work?
In Google Forms, email verification is only arbitrary. It cannot tell you for sure if the email is real or not. However, there are some ways you can validate at least one aspect of the email address in Google Forms.
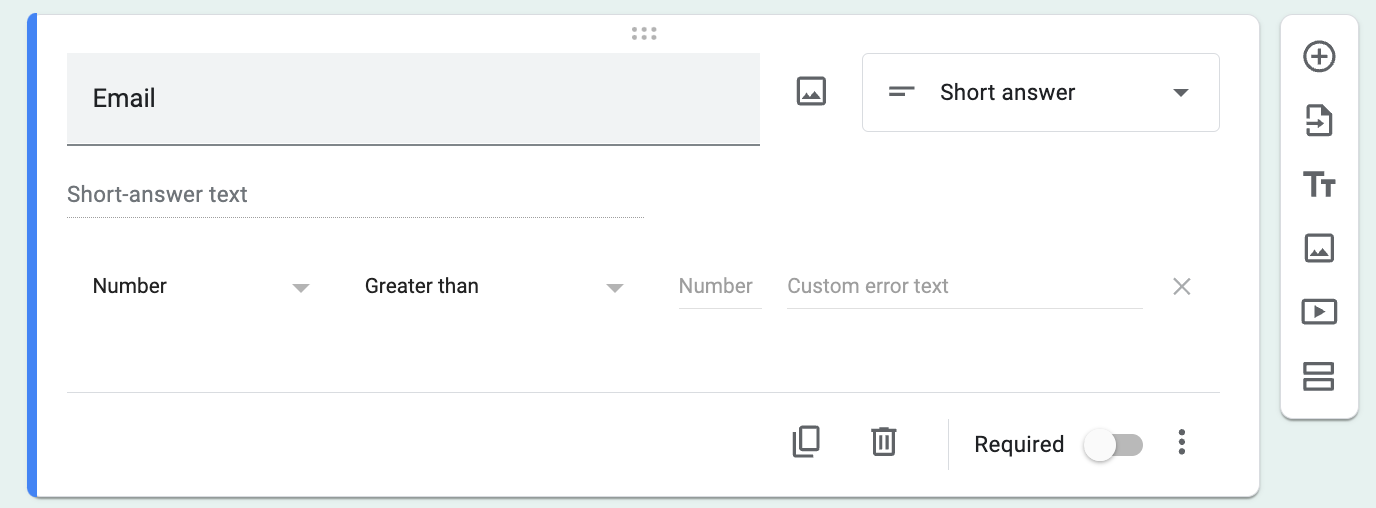
Add an answer box for email
Start by adding a question to your form. Click the “+” sign and a window will pop up.
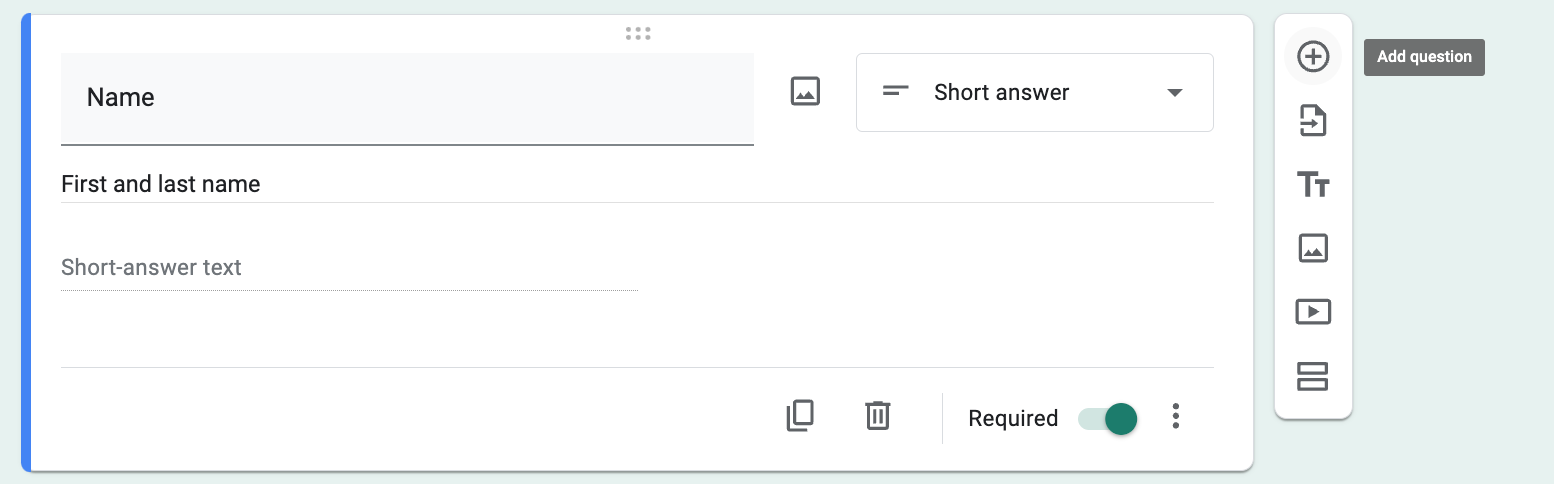
You will see an option to customize the field. Click on Multiple choice, and select Short answer.
Your field should look like this:

Now you have a way for the recipient to input their email. However, they can insert basically anything into this field, so your data will not be of the best quality.
There’s one better way to do it in Google Forms and it’s through a regular expression.
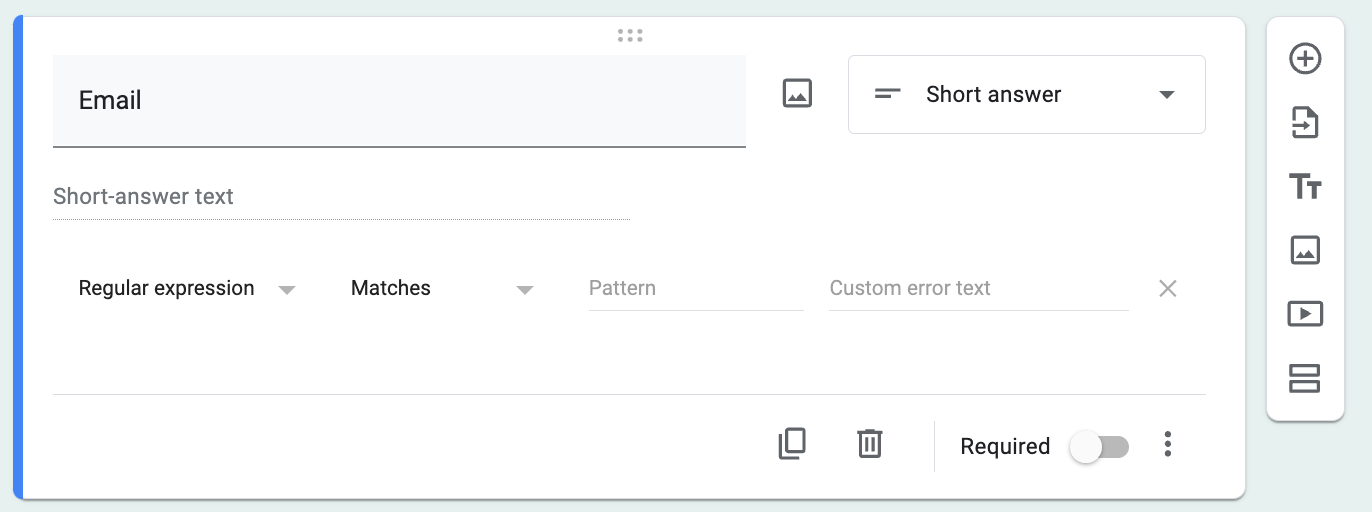
Use response validation
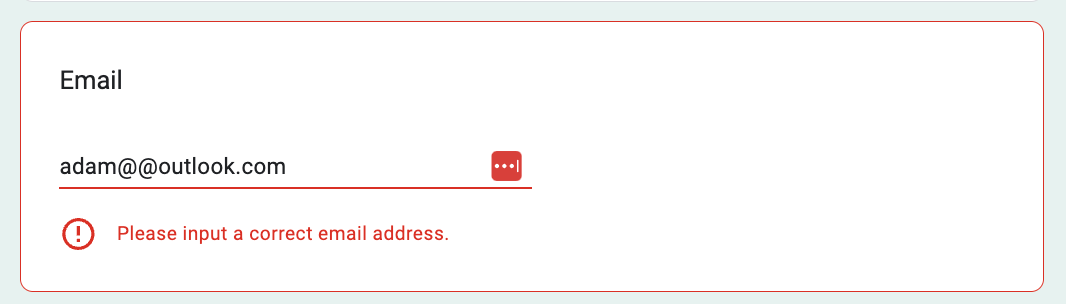
Response validation uses a regular expression to verify if the email syntax is correct. This means that whenever someone enters an email in the wrong format, for example, adam@@outlook.com, Forms will recognize it and reject the answer.
Here’s how to set it up for your Google Forms:
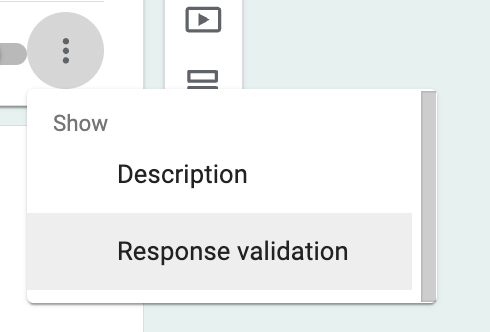
The three dots, located near the “Required” option in the lower right corner, lead to more settings.
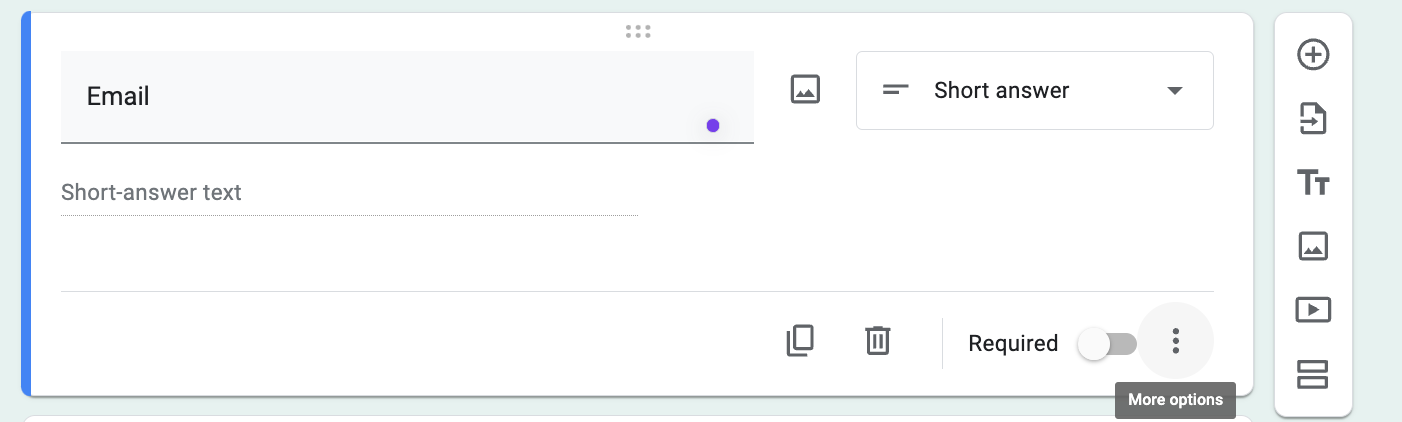
Click on those three dots, and you can see two options: Descriptionand Response validation. Click on the second one.
You will see a field where you can customize your validation rules.
To input the validation rules, your field should look like this:
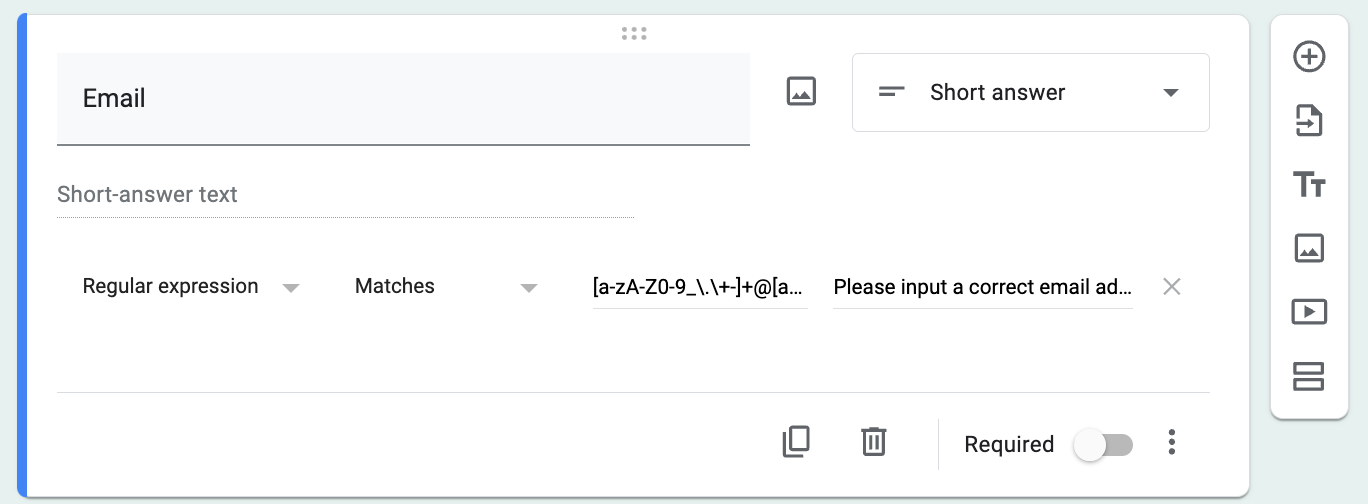
Then, in the Patternfield, paste this REGEX:
[a-zA-Z0-9_.+-]+@[a-zA-Z0-9-]+.[a-zA-Z0-9-.]+
You’re almost done. One last thing you should set is the custom error message.
That’s it! Now, your form will validate the email address syntax. You can preview the form in the top right corner. Here’s what it looks like in action:
This is a simple approach to validate email syntax. Anyone can set it up fairly quickly. Plus, it’s free.
However, it comes with some downsides.
The downsides of Google Form Email Validation
Syntax is the only thing you can verify in Google Forms. However, there are several other things that Google Forms just cannot do.
It doesn’t check if the email exists
Google Forms won’t tell you if an email address is real. You might be sending messages into a void. To avoid that, it’s best to double-check emails using a different tool. That way, you know your messages actually reach someone.
It doesn’t check if the email is a spam trap
Spam traps are risky email addresses that can get your messages flagged as spam. The problem is that they look just like any other email out there and Google Forms can’t catch them. A proper email verification tool such as Bouncer can spot spam traps and save your sender reputation.
It doesn’t check if an email is a catch-all address
Catch-all addresses are tricky; they collect all emails sent to a domain. Google Forms doesn’t identify them. This means your email might not reach the person you wanted.
It doesn’t check if the email already exists in your database
Sending the same email twice? Google Forms won’t flag duplicates in your list. Always check your database first. If you want to use Google Forms to validate your emails, you’ll have to manually check each entry and make sure you don’t already have it in your database.
Use an email verification tool instead
While Google Forms is free, it has many shortcomings that can put you in danger as a sender and ruin your reputation.
Bouncer checks if an email actually exists. You send emails, knowing they’ll find a real person. It also spots spam traps. This keeps your messages out of spam folders and protects your reputation. And, these tools can identify catch-all addresses. You get a clear idea of where your emails end up.
With Bouncer, you can check for and find:
- Outdated and non-existent emails
- Spam traps
- Catch-all email addresses
- Temporary addresses
- Duplicate addresses that already exist in your lists
You can verify your email responses in batches through Bouncer. Here’s how you do it:
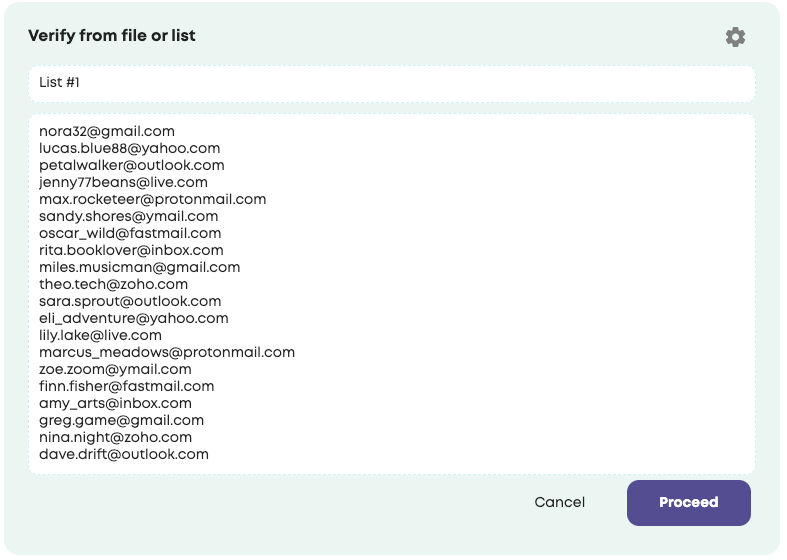
First, copy your responses from your Google Sheet.
Then, log in to Bouncer and select Verify list.
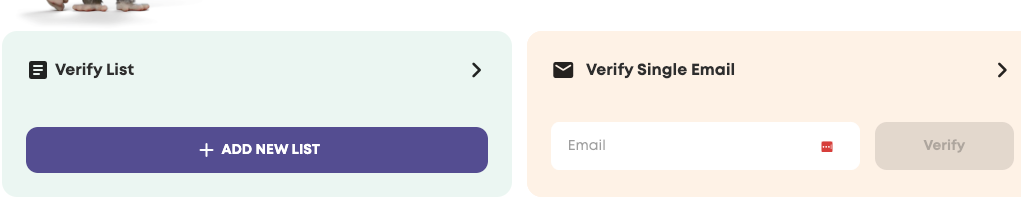
You will be presented with the option to either upload a file or copy and paste. Select Copy and Paste.
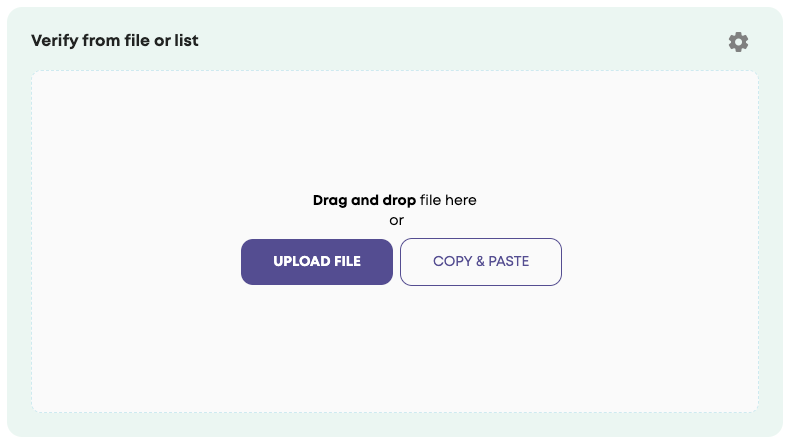
Paste your list and click Proceed.
After a few seconds, you get your results on whether the emails are toxic, valid, or duplicated:
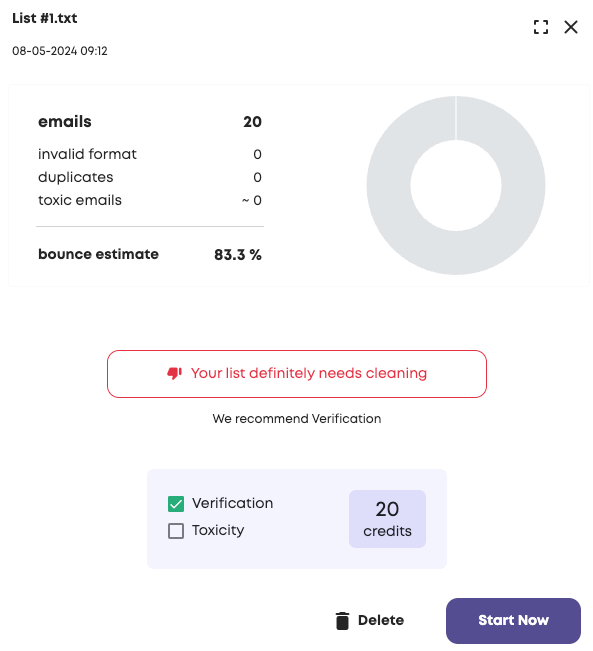
You can now verify the email addresses. Click Start Now.
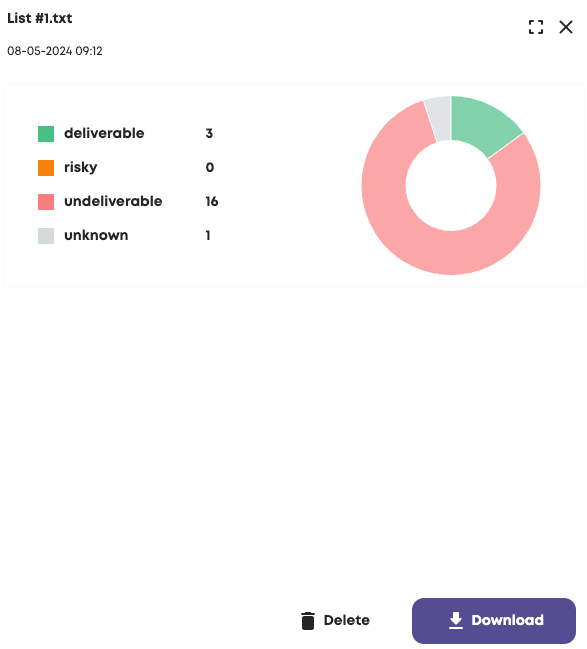
And there you have it! Your list is ready to download and clean up.
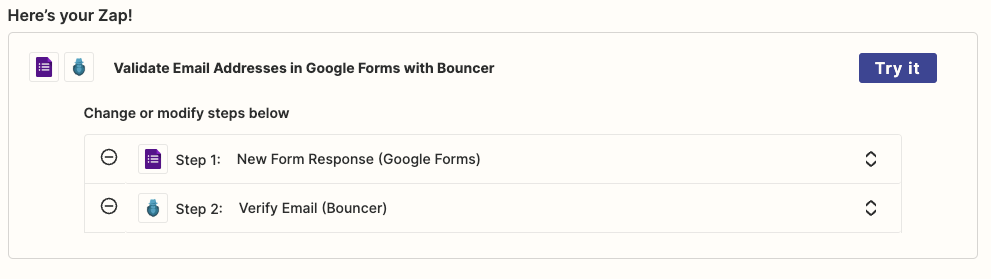
A third, more advanced, way of verifying emails from Google Forms responses is using Zapier and Bouncer.
Use a Zap
To create an integration between Bouncer and Google Forms using Zapier to automatically validate email addresses entered in a Google Form, follow these steps:
#1 Log in to your Zapier account or create a new one if you don’t have one already.
#2 You can use Zapier’s AI creator to make the Zap for you. Type in what exactly you want to do: “automatically validate email addresses entered in a Google Form using Bouncer”

#3 In a few moments, you will get your Zap. Now you can try it.
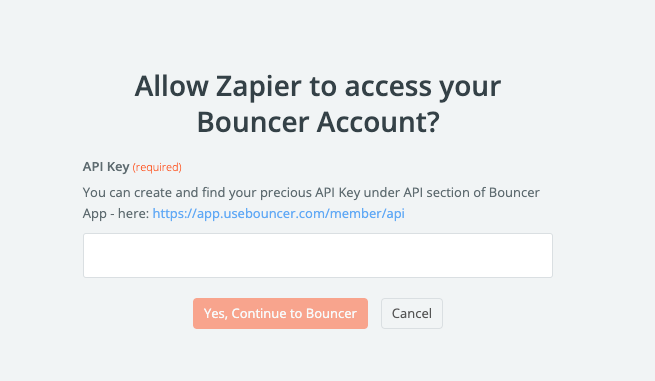
#4 Connect your Google Forms and Bouncer accounts.
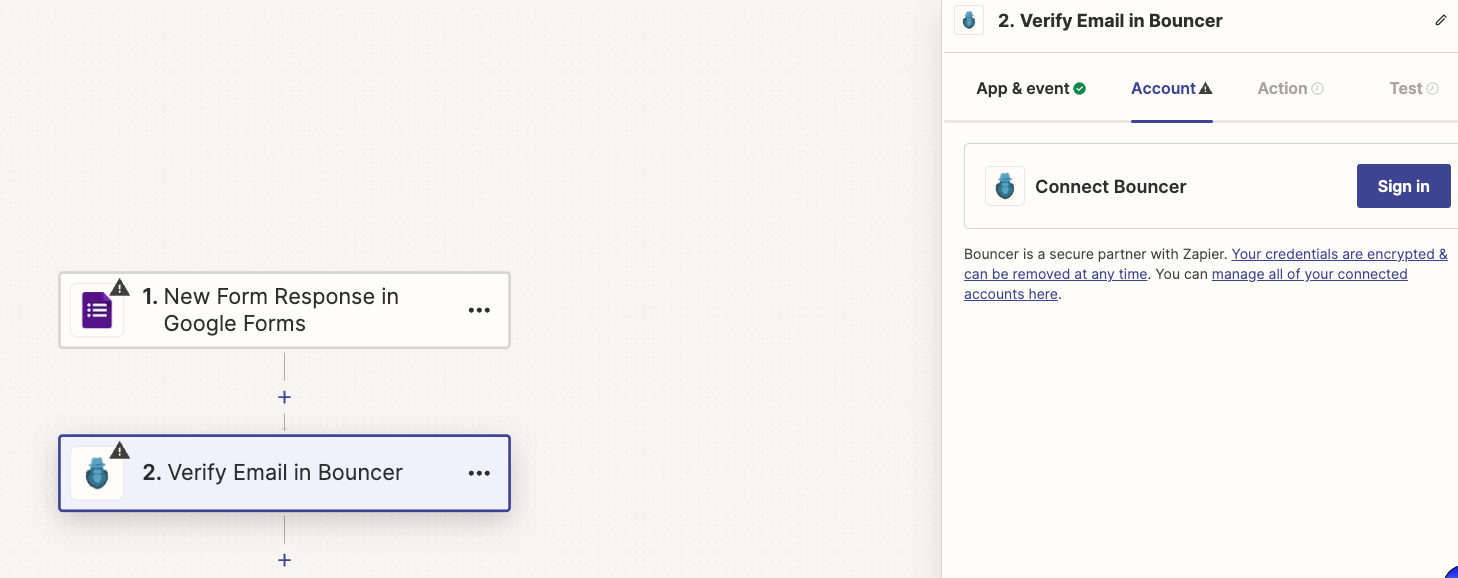
Select Google Forms and the specific form you want to monitor for new responses.
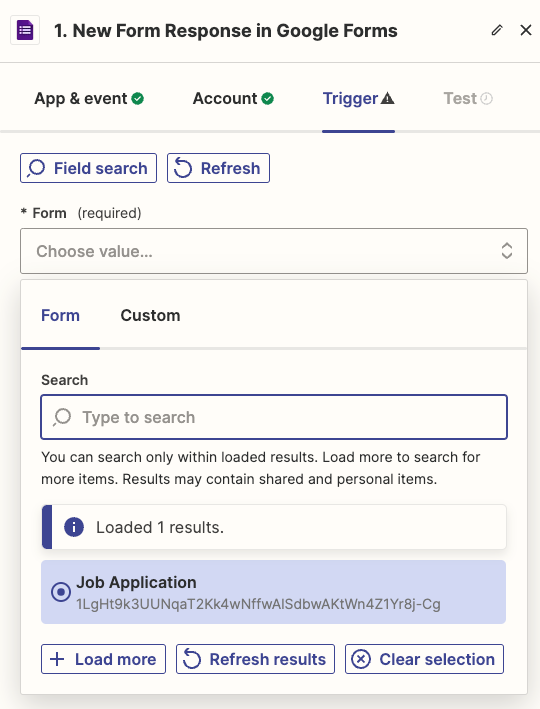
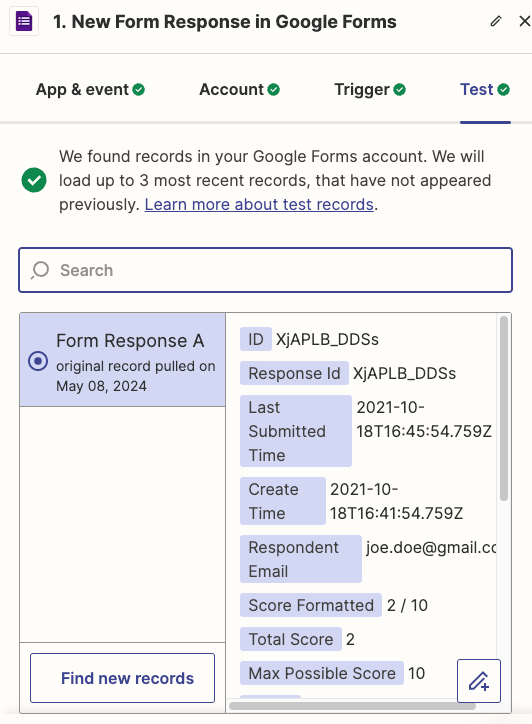
#5 Test the trigger to ensure it’s working correctly.
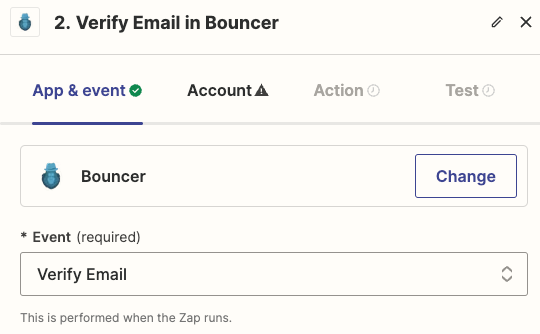
#6 Select Bouncer as the action app and choose “Validate Email” as the action event.
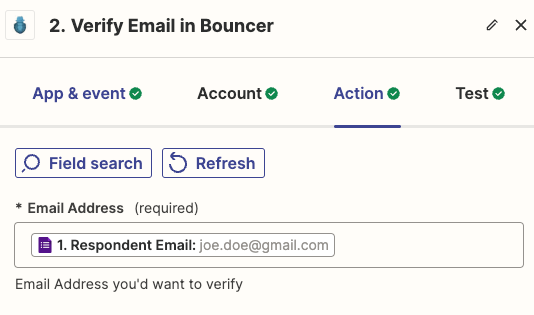
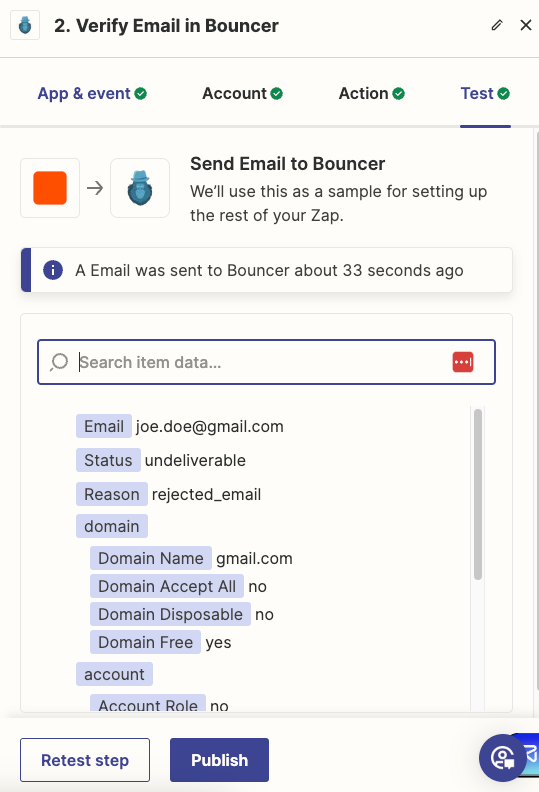
#7 Test the action to verify that Bouncer is validating the email address correctly.
#8 Click Publish to start automatically validating email addresses entered in the specified Google Form field.
#9 Click Publish to start automatically validating email addresses entered in the specified Google Form field.
That’s it! With these steps, any time someone submits a new response to the selected Google Form, Zapier will trigger the Zap, send the email address to Bouncer for validation, and continue the workflow based on the validation result.
Conclusion
Google Forms may or may not be the right choice for whipping up a quick survey, but it’s certainly pretty basic when it comes to email validation. It checks if emails look right, but stops there.
What about real email validation? That’s where it falls short. No checks for actual existence, spam traps, or duplicates. Your solution? Pair it with a robust email verification tool.
Tools like Bouncer guarantee emails are legit and keep your communications spam-free. Effective email validation means more than just catching typos; it’s about making sure your messages reach real people and achieve real results.
Integrate Bouncer into your process today and see the difference it makes in your email campaigns!
